SMILE 📸 Here is How to Make the Most of a Chromebook Camera
Have you ever looked closely at the capabilities and features for the camera app on a Chromebook? In this post I'm going to share some of the many ways that you can use the features of the camera app in the classroom.
TAKE A PICTURE
- Obviously, you can open the camera app and take a picture. The picture will automatically save in the "camera" folder in your Files app for you to access at any time.
USE A GRID
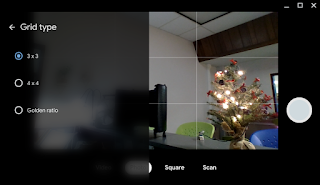
- You can use a grid by clicking on the settings gear to help to set up a photo using the rule of thirds. Once you choose a grid, then you can toggle the grid on and off while capturing your photo.

FLIP A PICTURE
- The flip feature lets you flip a photo vertically. This is nice if you want a character or image to face the opposite direction.
USE A TIMER
- There is a 3 or 10 second timer. This is handy so that you don't need to be within arm's length of your laptop to take a picture. Choose if you want the 3 second or 10 second timer in the settings gear and then click on the timer icon. Take a few steps back and capture your photo automatically.
RECORD A VIDEO
- You can record a video by clicking on the Video icon. Perhaps you want to send a quick message of encouragement to a student or parent or even to support a colleague!
SCAN A DOCUMENT
- If you aren't already seeing it, there will soon be an option to scan documents with the camera. Open the Camera app and select “Scan” mode. When you hold out the document you want to scan in front of the camera, the edges will be automatically detected.
MAKE A GIF
- And soon there will be an option to create GIFs with the Camera app. You will be able to record a five-second video with students or colleagues, capture a how-to demonstration, or record a series of events, and it will automatically turn into a shareable GIF.


Comments